Daily news, dev blogs, and stories from Game Developer straight to your inbox
Sponsored By
Creating walls to see the player through
To address this problem, we opted for a solution involving a shader graph.
2 Min Read

For the past 4 months I have been working as a programmer on a 3d game with a group of students at Indiana University.
In the game you play as a ghost shrimp that float around the level possessing objects and scaring the npcs that are walking around.
Problem:
Wall and many other assets in the scene obstruct the view of the player, which lessens the gameplay experience.
Solution:
To address this problem, we opted for a solution involving a shader graph. Specifically, we introduced an effect to the wall texture that allows the camera to see through it when the player is positioned behind the wall.
Implementation:
To implement this solution, we created a shader graph with several variables for fine-tuning the final product. The process involved three key components: determining the position on the material for the transparent circle, scaling the size relative to the camera and a variable, and creating a smooth circle effect.
Let's walk through it.
Create this list of variables in the shader graph, that will allow for tweaky the final product.
"WallHacks" is what I have decided to name the shader graph.

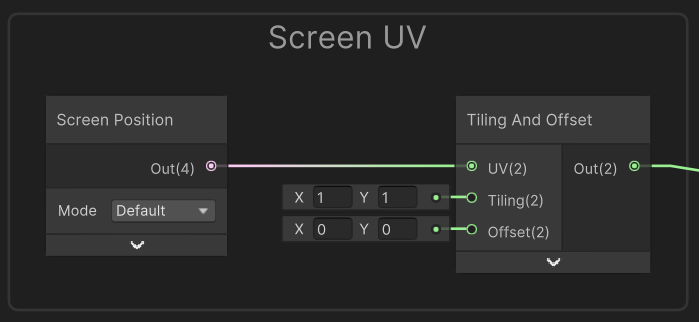
We need to get the position on the material where we want to put the transparent circle.
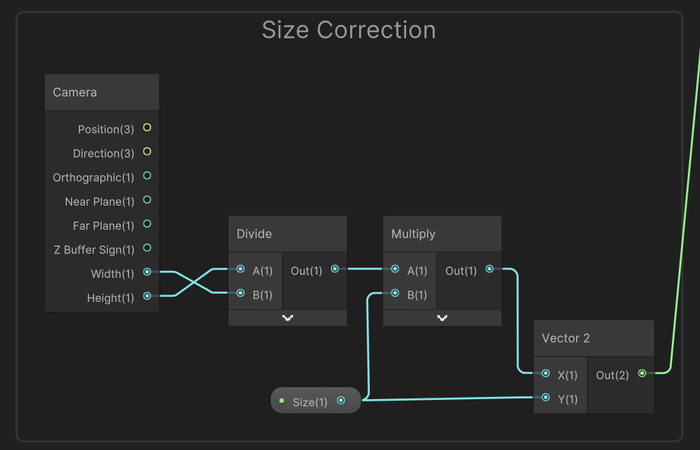
Now we need to scale the size to the camera as well as make the size change according to the variable we have.
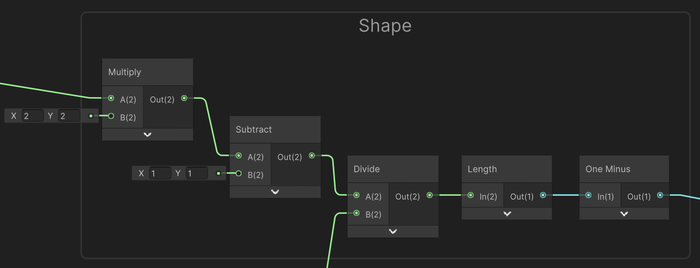
Now to create the circle that we want we need to make the configuration below and link the output from the position group to the multiply A(2) in the first node and connect the output from the size correction group to divide B(2) in the third node.
Now to make it smooth adding the nodes in the image below. Taking the output from the shape group into the saturate cell.
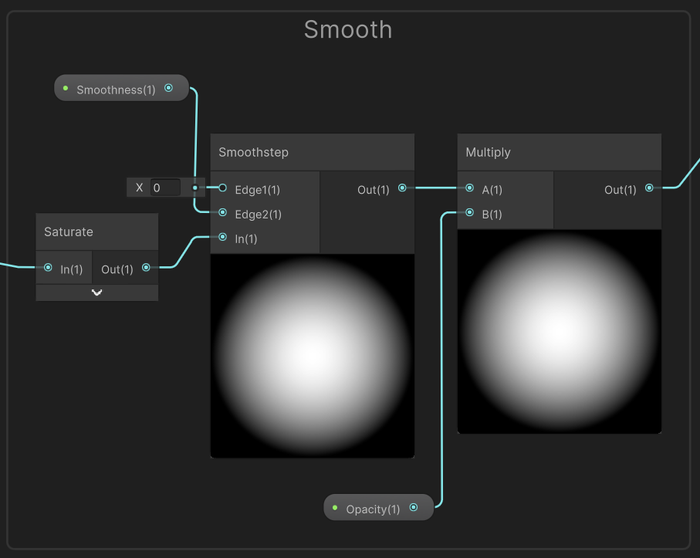
Taking the output from the smooth group into a one minus cell and than into the Alpha of the main fragment node.

Also you will want to create a texture group for your material and input that into base color of the fragment node.

Now you are done. And you can make materials with that shader graph.
The complete shader graph should look like this.

But if you wanted to quickly change the shader on an object with a material already on it you will run into an inconvenience. That being that when you change it with the drop down that the texture wont remember and you will need to find it in your project folders.
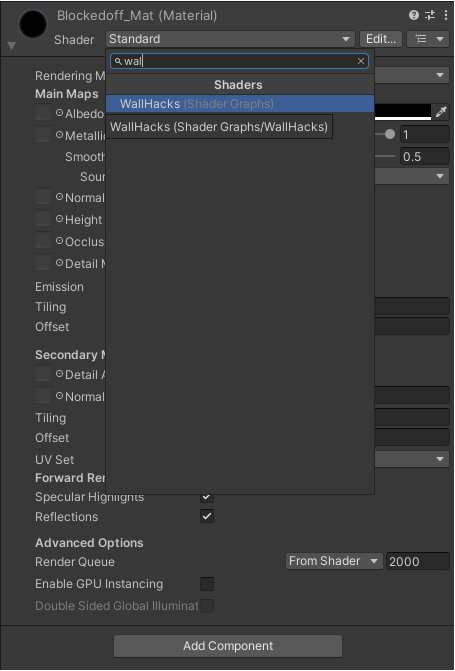
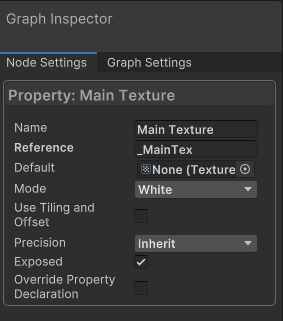
An easy fix: in the shader graph, you must change the reference to the Main Texture variable to "_MainTex".
And now when you change the shader of a material it will remember the texture that was on it before.
Read more about:
BlogsAbout the Author(s)
You May Also Like


