Custom UI bars in Unity (Using Sliders!)
In this post I will walk through my process for making these sliders and the troubles I worked through for the final product.

I have been the leader programmer for the 310Games LLC since August 2023. Despite what the title may suggest however, I am not always just required to do programming work. Sometimes I need to make, for example, custom UI sliders for our art folks to come and touch up later. So, in this post I will walk through my process for making these sliders and the troubles I worked through for the final product (at least before better art was added!).
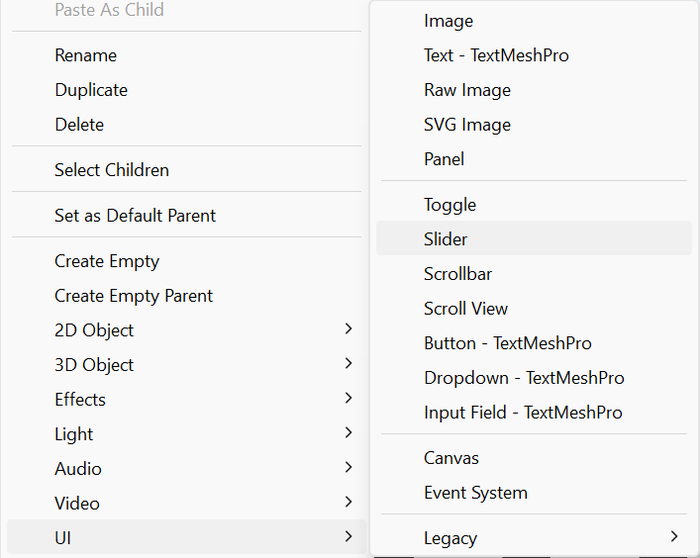
To begin with, I had to make the sliders themselves. In Unity, this is as simple as right clicking in the hierarchy, going to UI, then selecting Slider.
This creates something that looks like this in the unity scene:

Now in the hierarchy, click the drop down menu under the new slider and and notice the sections labeled "Background", "Fill Area", and "Handle Slide Area". In my case, I was handling the bars purely through code and with no other interaction, so I deleted the "Handle Slide Area" object entirely, as it was not needed for that case. That will leave you with a bar that looks like this:

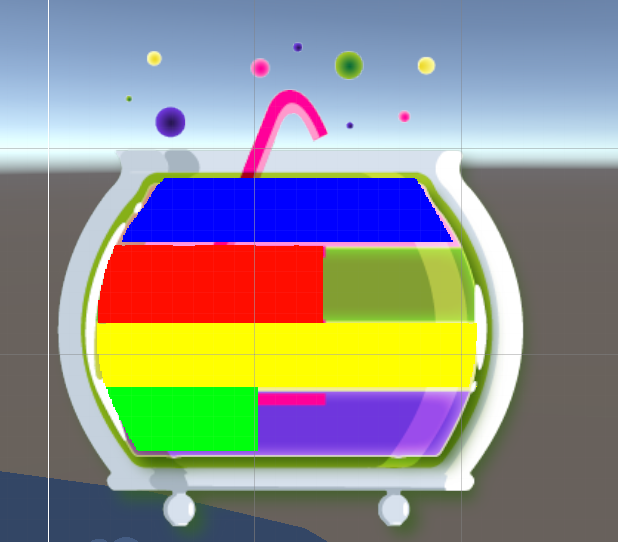
Now, you want to select the object in the hierarchy called "Background" and find the image component on it. Under "Source Image", select whatever image you have that will become the shape of the bar. For this step-by-step example I am creating the bottom-most slice of the earlier cauldron I showed. Next, click the dropdown menu next to "Fill Area", find the image component on this one and select "none" as the source image (this will make sense in a moment). Your slider should not look something like this (using your own custom shape of course):

So, you might be wondering why it looks so funky. No worries, if we go back to the Image component on the Background object, you will see a button that says "Set Native Size". Click this button, and everything should start looking better.

Finally, go to the "Fill Area" object. You will notice that it does not currently have any components other than a Rect Transform. In an area underneath that component, right click. We are going to add three components: A canvas renderer, an Image, and a Mask.
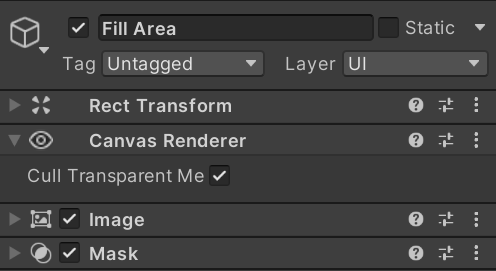
You can leave the canvas renderer alone. In the image component, once again add in the image you are using for the shape of the slider and set native size. You might have to move some things around at this step to make them line up. Finally, under the mask component, uncheck the box that says "show Mask Graphic". To test if everything has gone as planned, go into the "Fill" Object again on the hierarchy and in the Image component, select a color other than the default. If you then select the overall Slider object and find the Slider component, you can scroll through and find the "Value" slider. Try moving this up and down and if you see your slider filling with your selected color, you have done it! If not, I reccommend double checking the previous steps. While in the Slider component you should also uncheck the "Interactable" box and set the Transition drop down to None. Look into these if you have need of different functionality, however for the purposes of this post they are unneeded.

Now, for the code.
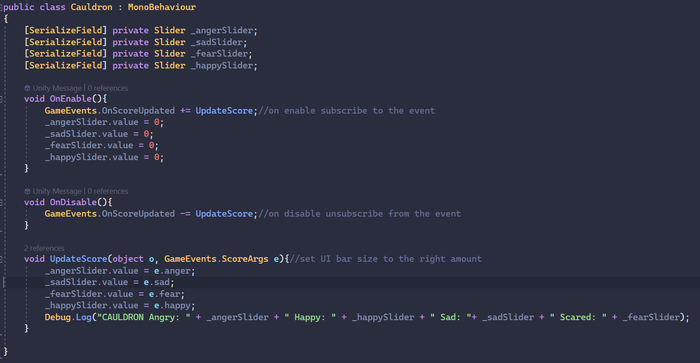
Here is an image of all the code I used to control the sliders. Simply make an empty gameobject in the Unity scene and drag your code onto it. Make serialized fields for your sliders so you can access them in your code(or define the sliders in your code your preferred way, this way is just simple especially with a low number of sliders). In our game we use a system of listener functions to help decouple all of our objects. So, whenever the score is updated by a different file, it sends out a signal and any file that subscribes to that signal will hear it and get the needed information. You may consider putting this empty game object into a prefab along with the slider if you will be spawning many different instances like spawning many enemies each with their own health bar. Then, you simply set yourSlider.value equal to whatever number you are trying to track. You can also set the max value (aka the value at which it will appear full) with "yourSlider.maxValue = number" or you can set a value in the Unity inspector in the slider object, slider component.
There you have it! A programmers implementation of a simple custom shaped slider. The opportunities afforded by this implementation are plentiful and it also has room to include any other custom aspect you may need of it. Thank you for reading!
Read more about:
BlogsAbout the Author(s)
You May Also Like


